Tuesday, 22 March 2016

Easy, Easter boy's bonnet

There are so many firsts in our household this year thanks to Master P starting school. One of the latest rites of passage I had the pleasure of navigating this week is the joy of creating an Easter Bonnet for the school Easter parade. This one snuck up on me and as always being time poor I needed something that was going to be easy to create. Also something that a 5 year old boy would be happy to wear, as surprisingly fluffy bunnies and colourful eggs aren't his thing (unless of course he can eat them.) 
Like many lads his age Angry birds are all the rage and has been a hit for the better part of four years. Now we might have been clutching at straws with the Easter theme but the link is that Angry Birds protect eggs and eggs are Eastery. So with a vision in mind we (I) whipped up a Red Angry Bird bonnet (hat) that was super cheap, easy and effective. Ticks all the important factors for a successful craft adventure I say. At the bargain price of $5, it took all of about 15 mins. 

Here are the details...

You'll need:
A red hat 
Yellow felt or card
Feathers
Eggs
White card
Strong glue
Black marker
Scissors


Step 1: Use an image of the Red Angry bird's face such as the one below as a guide for drawing eyes and eyebrows onto the white card using the black marker.


Step 2: Cut out two triangles, one larger than the other, for the Angry Bird's beak. I used yellow felt. 


Step 3: Glue the eyes and beak to the front of the hat. Glue the Styrofoam eggs on the side rim and glue the feathers onto the back of the hat so that they stick up over the top.


And hi ya! You're done, it's as simple as that.

Angry bird, happy boy.
Simple, cheap, easy, fun and effective! 


Tuesday, 15 March 2016

Devine decorative biscuits

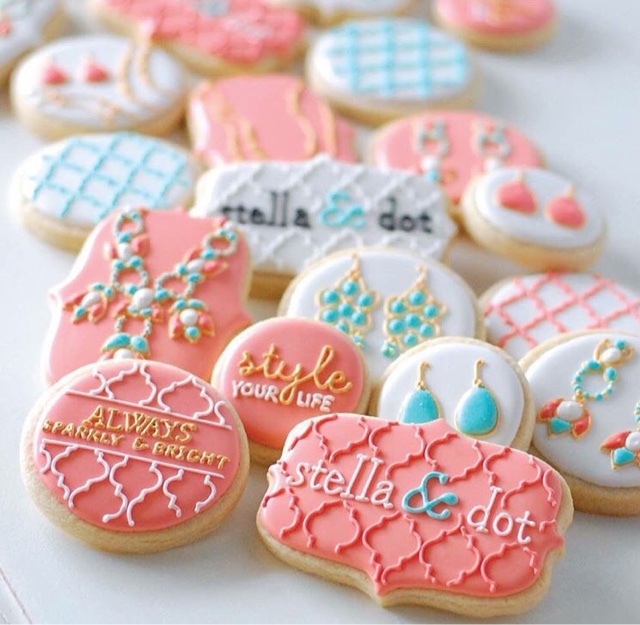
have long admired the clever creative and culinary skills of the bakers out there who make those devine decorative biscuits. Such as these beauties by Beau Monde Bakery.


Aamazing!!! As a creative dabbler who loves the satisfaction of having a go at any creative challenge. I decided to have a go at making my own decorative biscuits, a more simplistic version anyway. My youngest babe's Christening gave the perfect excuse to attempt these sweet treats. 

As usual I only share my successful creative ventures so suffice to say they were a success. Read on if you want to know how and indulge my shameless pride of my first ever attempt. With some first timer hot tips. 

Like any good craftswoman knows you need the right tools for the job. I wanted to decorate my biscuits with embossed writing so I turned to eBay to pick up a biscuit stamping set. 


I researched for the right biscuit recipe by perusing Google for the recipe that matched the ingredients I had at home (convenience is always vital for my creative projects). Knowing that Martha Stewart knows her shizzle I settled for her sugar-cookie recipe. 


http://www.taste.com.au/recipes/32317/martha+stewarts+sugar+cookie+bell+cutouts

The biscuit dough once made needed to be refrigerated for at least two hours which I left it overnight to chill. Following the instructions I made two discs which became two batches of cookies for me. I used one batch in the morning and the other in the afternoon for time reasons. Each batch took me about two hours to complete with rolling, cutting, cooking the biscuit dough and rolling, cutting and decorating the fondant and combining the two. 


Choose the cutter shape/s that you want for your biscuits. These will be used for the biscuit and fondant too. 

Now the logistical fun begins. You first need to prepare the fondant decorations. The biscuits don't take long to cook and it is preferable that they are hot for the fondant to best stick to the biscuits. Roll and cut out the shape of the fondant. 


Tip: Work with the fondant quickly as it can dry out and form a crust or crack if left out too long.


Now for the fun part! Let your creative juices flow and decorate anyway you like. I went for embossed writing, decorative sprinkles and decorative glitter. I used a heart stencil and some sugar syrup (warm water & sugar) to make the heart glitter shape. Tip: Paint a small amount of sugar syrup in the stencil shape as too much liquid will make the glitter bleed. 


Hot tip: Plastic wrap the fondant while you prepare & cook the biscuit dough so it doesn't dry out. 


Roll and cut out the biscuit dough and cook for 10 -14 mins. 
Tip: Use baking paper between to dough and roller to save from the dough sticking to the roller.


When they're lightly golden take them out and place the fondant on top. The heat will make the fondant stick. 
Tip: If that doesn't work, paint a touch of sugar syrup onto the base of the fondant and place it onto the biscuit.


Voila you are done! If you're like me, stand back with reverence and admire your handiwork. 

I have a greater appreciation for the biscuit bakers out there. These were quite time consuming and that's just for a basic design. I can only imagine how much time and effort goes into the fancy ones! Justifies what I used to think was a costly treat. 

Well worth the effort though. The family were all full of praise and impressed with their bomboniere and even better they tasted good too! (Martha sure does know her recipes). 


Thursday, 11 February 2016

Getting up-to-date

This post is probably a little late in the year for some but is quite telling on where I am in the organisation stakes.
Up until recent times I have been completely satisfied with using the calendar application on my phone as my sole reference point for all things "to do", "birthdays" and appointments alike.
Now that Master P is off to school I realised the need for something visual, on display, for all of us to refer to.
As usual I had something in particular in mind, I wanted a blank, squared monthly calendar that I could display on the fridge that wasn't too big, ideally smaller than A4. Getting out of the house to shop for said calendar was near impossible and the selections left at Kikki K and Typo were limited (clearly I'd left my run too late). So I turned to the internet which is the perfect time filler as I sit and feed and sit and settle bubs. Scouring the internet and searching for the right fit (I was quite specific in what I wanted) did not return any potentials to buy. However, I stumbled across a perfect style that I could print. Even better it was free!! Courtesy of www.delineateyourdwelling.com


http://www.delineateyourdwelling.com/2015/11/2016-hand-lettered-calendar.html

Clever Amy from Delineate Your Dwelling hand wrote the typography for the Months of the calendar. Clearly one who strives for perfection she wrote out hundreds of versions of calendar titles and selected the best ones which she then generously shared.

Very happy with the style and able to print to the right size I almost had what I was after except it was missing something. That splash of colour. For a long while now I have owned a set of watercolour paints that I have been longing to play with and the calendar presented the perfect opportunity.
And play I did. It was thoroughly enjoyable and I was pleased with the results. Simple, effective and each one unique.


Here is the result..


Follow the link to get a closer look
https://flipagram.com/f/kDCqDae3ob

Which one is your favourite? (comment below, I dare ya). Hubster prefers April which just happens to coincide with his birthday month. That's fortuitous. 

Til next time...

Michelle

Instagram: @shelladores
Pinterest: shelladores
Blogspot: www.shelladores.com


Sunday, 31 January 2016

Pastel prettiness

Summer brings a sense of cheery brightness, light and colour that is best reflected by pastel hues.

While pastels are never far from favour they seem to have made another recent revival. The soft pastel tones create a soothing feel making it a popular choice for children's rooms and nurseries alike.

Pastel colours are versatile and impartial being suitable for either gender depending on the colour combination.

The preference for pastel is appearing more frequently in my Instagram news feed which is always a good indicator that they are in style.

Here is a selection of pastel pretties that would brighten any space from a few of my favourite Insta stores...


 http://www.thegingerkids.bigcartel.com

The Ginger Kids sweet pastel blocks are paired perfectly with my favourite pastel colour combination. 


www.facebook.com/emspattyscraft

These Em Patty's crocheted cuties truly capture pastel playfulness perfectly. 


@tinydolldesigns          tinydolldesigns@yahoo.com.au

Tiny doll designs has the pastel spectrum covered with these sweet wooden dolls.

Bunny by http://faithlaine.bigcartel.com & Pastel board by http://www.poppypeach.bigcartel.com

Faith Lane & Poppy and Peach's devine duo bring pastel prettiness to any shelf. 

http://www.koabykaitlin.com.au

It's hard to go past a Koa creation and even more so with this pastel pairing. 

http://www.mitahlidesigns.com.au

The soft and subtle wooden wonders by Mitahli Designs would be sweet for any wee ones space. 


It is easy to see the appeal and charm of pastels & the reason for their longevity. 

Ah pastel perfection is purely paradisal and I am proudly passionate. (Apologies, I do love a good bout of alliteration.)

Til next time...

Michelle
Follow me on Instagram @shelladores

Blogspot: www.shelladores.blogspot.com


Sunday, 10 January 2016

Harmonious hues - Colour of the year

'How's the serenity' and 'a rose by any other name' come to mind when talking about Pantone's much anticipated selection for colour of the year. The global authority in colour, Pantone, selected a blend of two colours, Serenity and Rose quartz, as the 2016 recipients. For the first time they chose two colours and forecast the soft pink and blue pastel palette best reflect a time of soothing and gender equity.


Pantone believe this colour combination provides a sense of calm and order.


Nature seems to share a partiality for these harmonious hues as reflected below.

I do love these tranquil tones and look forward to seeing them reflected by fashion and interior designers.


I am feeling inspired to get out the paints, see you soon with the results.

Til next time...

Michelle  xx
@shelladores